

How To Simplify Colors In Photoshop
Y'all desire to remove some of the colour from an paradigm. Sometimes, you lot don't similar the way certain colors look in an epitome. Maybe yous want to change the effulgence or dissimilarity. Or maybe you want to remove some of those pesky colors that are making your eyes bleed.
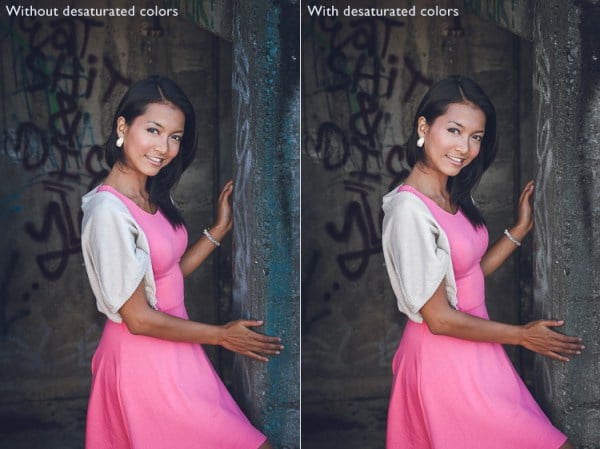
In this tutorial, we'll prove you how to utilise the Curves tool to adjust the colour balance of an original photo. By adjusting the curves, you tin can speedily and easily remove unwanted colors from an paradigm. Nosotros'll also show you lot how to use other methods to desaturate the colors so that they are more pleasing on the centre.
How to Use the Curves Tool to Desaturate the Colors of an Image
Steps for using the Curves tool to modify the saturation of a photo:
- Open your paradigm in Adobe Photoshop CS6 or later past double-clicking its thumbnail. You will come across information technology open as a new document with default settings. The background is white because yous are working in "RGB mode". This means that your original file was saved every bit RGB Image data.
- Click the Curves icon at the bottom left corner of the Layers panel. A small box appears around the curve control. Drag up or down until you lot get the desired effect. If you drag besides far, you may end up irresolute the brightness instead of the saturation.
- Salve your work when washed!
Choose JPEG format and save the file somewhere safe.
How to Use the Hue/Saturation Tool to Desaturate the Colors of an Unabridged Epitome
- Open up the file in Photoshop and add a Hue/Saturation Adjustment Layer and place it to a higher place the original layer. Go to the bottom right of the screen and click the Effects button (the circular one). Once you click on that, the Hue/Saturation panel will come upwardly.
- Click on the Saturation slider and motility the slider to the left until you achieve the -30 to -fifty level.
- You can also reduce the lightness level to further desaturate the image. Move the slider to -8 and see how it looks. Adjust equally necessary.
Desaturating Private Colors Using the Color Color Range Tool
Permit's say you have found a photo of a palm frond that you want to apply for a design project. You love the colors of the fronds and the background colors. The only thing y'all don't like is the stalk. It has a glaring yellow/green color that is simply too vivid. Yous can use Adobe Photoshop to tone downward the glare. Here's what you practice.
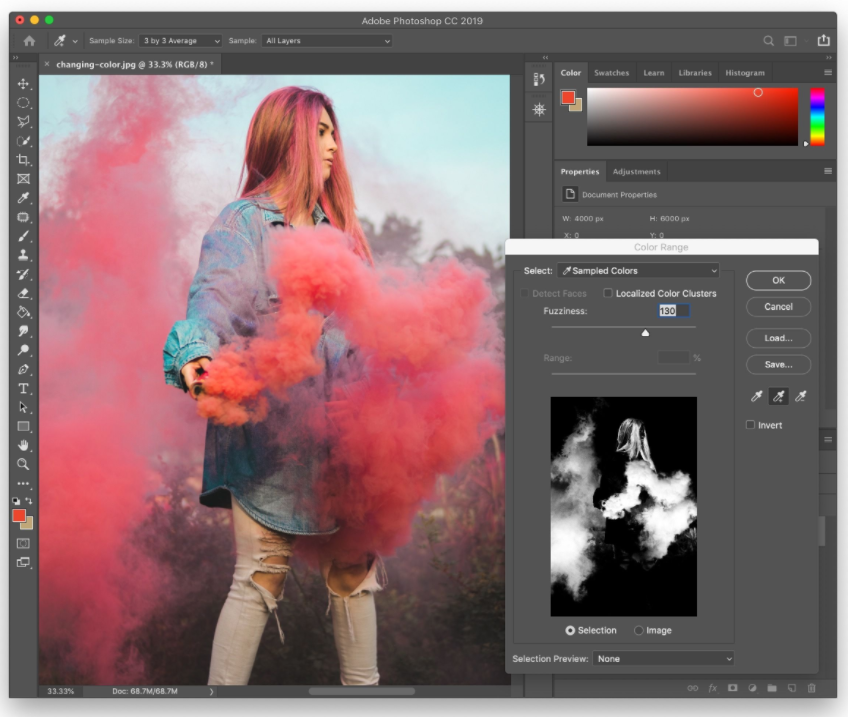
- Select the area where you would similar to recolor. Then select the Color Range. The Color Range dialog box opens.
- Choose one of three options depending upon which part of the image you'd similar to modify. For example, if y'all wanted to make all green plants expect less vibrant, choose Greenish Leaves Only. Or maybe yous just desire to darken the stems without affecting the leaves. In that case, choose Stems Only. Finally, in that location might be some areas of the image that demand no adjustment. These could include sky, water, etc. Choose None.
- At present click OK twice to close both windows. Your selection should now appear highlighted.
- Make sure the foreground color is set to black.
- Click inside the fill window and type l% grey. Press Enter. The selected portion of the picture should turn grayness.
- Double-click anywhere exterior the selection to exit out of the Fill Window.
- To bring back the original colors, press Ctrl+Z.
You've successfully inverse the hue of the institute. But did you lot discover something else? When you reduced the amount of yellow/green in the leaf stalk, the other colors became brighter. That's because the Green channel is being used as the base value. And then any changes made to this channel bear on everything.
Make sure the G channel is not checked. Click on the Saturation tab. Gear up the Saturation setting to 0%. This way, the values from each channel remain separate.
If you're having problem getting the right results, try playing around with unlike levels of adjustments. Experimenting with these tools allows y'all to fine melody your concluding product.
Utilize the Desaturation Presets to Become More than Creative with Images
The following preset controls volition help you create more interesting furnishings than those offered by the standard desaturation tool:
- Black & White Creates monochromatic grayscale versions of your photos.
- Sepia Tone: Adds a warm sepia tint to your pictures.
- Negative Exposure: Makes your photographs darker.
- Posterize: Turns your images into posterized designs.
These presets offering a quick and make clean way to tone down the colors of your images. They are great when you're working quickly or creating multiple variations of a single image. If you lot find yourself using these tools frequently, consider adding them to your custom settings console and so they'll always be available.
From here you can browse through existing presets and download additional ones. Just search for "Photoshop" under the Filter menu.
The next time you find yourself wanting to alter the overall advent of an image, consider trying ane of these techniques. They are easy to learn and will requite y'all great results every time.
Hope this helps!

How To Simplify Colors In Photoshop,
Source: https://nesop.com/how-to-desaturate-in-photoshop/
Posted by: taylortocke1937.blogspot.com
0 Response to "How To Simplify Colors In Photoshop"
Post a Comment